Friday, August 18, 2017

Summer Progress


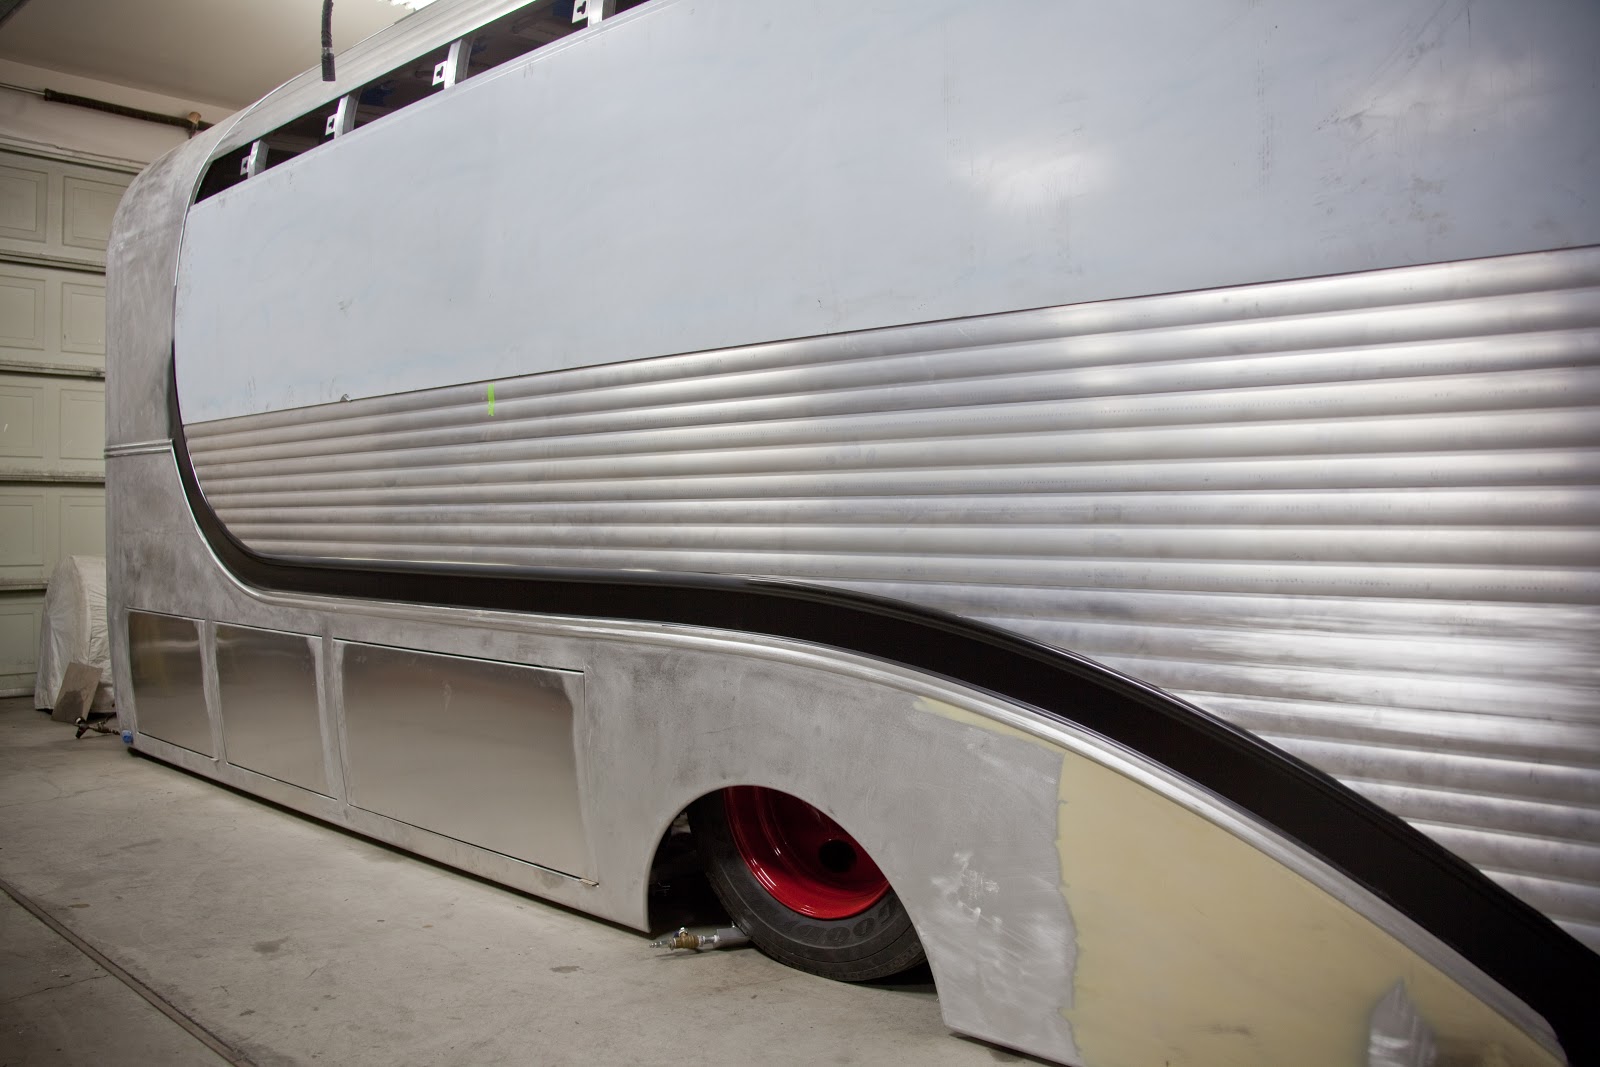
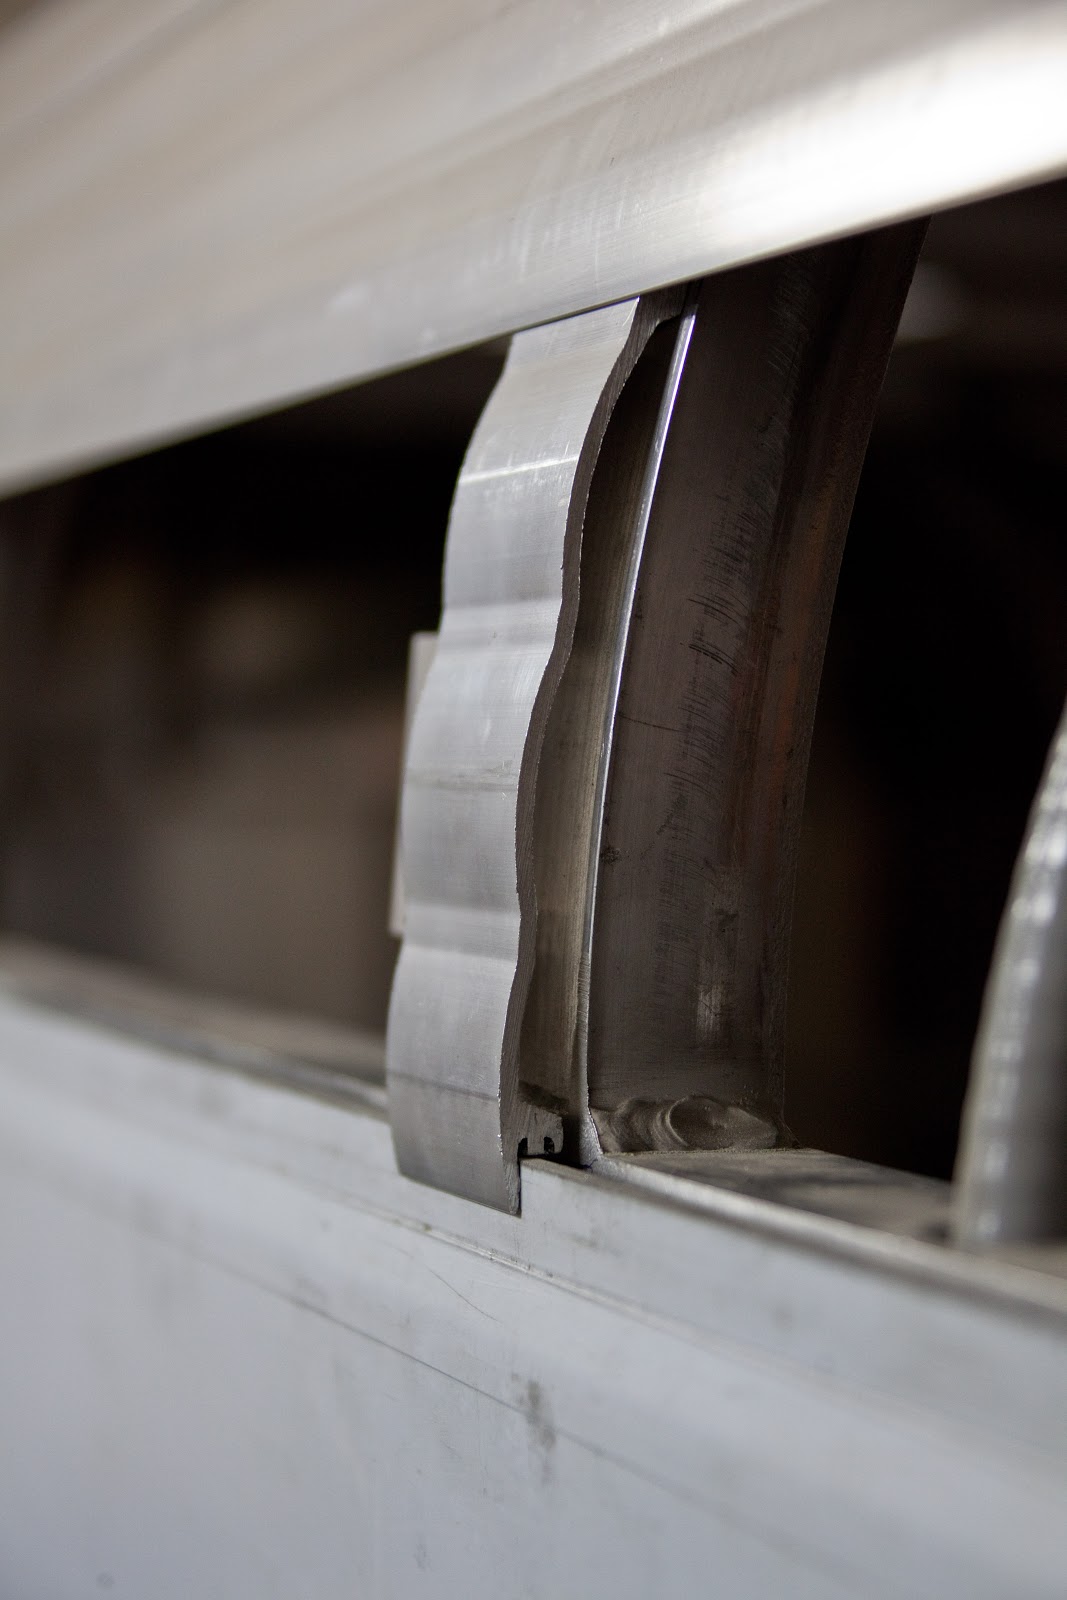
Not a lot of exciting things happening on the truck so far this summer. Well I should say not exciting in the fabrication aspect of the project anyway. We have been working on all the loose end stuff to get it ready for the trip to the body shop. The final piece of the exterior is to finish up the service window. We have the door opening tact in and will have to wait till the box get painted to finish up the final opening. This is so we can remove the siding and get the paint under the lip that the siding butts up to. The interior of the box will also wait till after paint so that the panel could be body worked from both sides. Been working on the logo that will be on the side of the polished portion of the box. It will be about 25"x 84" when done and be machined out of aluminium. Chris finished up the brackets for the propane tanks and the siding to complete the back area of the truck. Chris has been working on a vintage trailer for a customer and when finished we will start to work on some of the assembly of the cab and get it ready for some of the upholstery work. We're hoping to have the box back from paint by the end of the year so we can get started on putting things together. So unfortunately you won't see many post till then. I will try and keep everyone up to date on the progress.
    
The first time the box has seen daylight. Getting ready to load the beast on the trailer.

It was great to see the box from a different perspective and to take it all in.

Well this was the last shot I took before we loaded it on to the trailer. I planed on taking more but I got a little stressed when loading the truck and taking pictures was now not my top priority. We had a 24' 14000lb trailer with a hydraulic tilt bed thinking we had plenty of trailer. We could have used about 3' more and things would have been a lot less stressful. We had two winches to pull the truck up on the bed of the trailer which work great till we started to lower the tilt bed down. When you see the front of the bed go down and the back is still about only two inches off the ground you start to panic a little. Of course we borrowed the trailer from a good friend and I'm thinking we are totally bending his bed frame in two. We facetime him to see if we should continue and he said keep going it will be fine. It worked, but we had no tongue weight on the trailer. After about two hours of working on getting more weight up front and making sure we where safe to make the 35 mile journey we headed out. The good news is that we stop at the scales to get a starting weight before we started, then we stop and weighed the load. The truck weigh in at 8900lbs. We took it real slow and only had one of those I should slow down feeling. We started to load the truck around 10 and where unloaded at the body shop at 5. Over all it was a good day with no unforeseen incidences and the best part the body work and paint have started.

Okay maybe we have done some exciting things this summer. This is the start of the logo that was routed out of a 3/8 sheet of aluminum. Before this we had made test pieces at a smaller scale to work out any changes that needed to be made to the logo. 

The logo will be 25" x 84" and will go on the flat polished aluminum on the box.

The guys at Meticulous Detail Manufacturing invited us over to see the project get started. It was incredible to see how the process worked to get to the finished part. 

  The chips were flying.

Chris holding up the first logo that was unfortunately not a usable part. Jesse at MDM was gracious enough to let us have the part to do some experimenting on.  Some of it will be painted, sandblasted, and polished. We also made a couple of change to the part that we thought needed to be addressed for the next run. Jesse has work very hard to make this project become a reality. When things haven't been right he has made sure to make them right. If your looking for some custom work that you need done I would highly recommend the guys at MDM in Portland.
       
Tom over at Silvercreek Auto Body has been working hard on getting the box flat and ready for paint.
A lot of  hammering and dolly work on the top panels to get it ready for the skim coat that has been put down.

Starting to work his way down the the sides.

It's coming a long nicely. Still a lot of work to be done. Sanding, blocking, sanding, blocking, you get the picture. I must say though that Tom is knocking it out of the park. That's all I have for now. Will try to keep everyone in the loop. 


Sunday, March 26, 2017

Last Touches on the Cargo Doors

Been Working on the last touches on the cargo doors. All the cargo doors have shaved door handles which took a lot more engineering then we where expecting. But in the end it was well worth the effort. The power that we needed to power the door solenoids run through these contacts.

It took us a couple of tries to find the right door popper that would work. The small doors we where able to use one, but it took two for the bigger ones.

Here you can see the location of the contacts and the popper in the top of door.

Used Spal 8lb door lock actuators to release the door latch and made the bracket to hold it in place. Again we tried different actuators and this one seamed to be well built and pulled harder then the more expensive one that we tried. 
   
It's a straight pull to engage the the latch which I think helps out a lot on the success of the actuator.

We also made a emergency latch so that if we had any failures we could still get the doors open. We still plan on making the release lever more attractive. 

To some of you observant followers you will notice that we had to change are design on the latching plate that holds the striker. The first one didn't get the pin out far enough to engage the latch.

We used 20lb gas shocks on the small doors and 40lb for the large ones. This is what Chis and I stressed out most of about the making of the doors. How many pounds will it take to open and hold the doors up, where do we place them, and how long of a shock do we need? In the end it all worked out and ended up not being the hardest part of building the doors.


Door gaps are all done and ready for a little fine tuning on the body work side.

The last touch was to add the back panels to the doors.

Hope this works. a little video of one of the doors in action.

Pulled down the 16' panel to give the bottom edge a beveled to match the siding.

We made three passes with the router so that we didn't have to take all the material off at once. This was after the second pass was made.

Getting ready for the last past.

Chris used a piece of tubing for a guide to run the router down the piece of material. It took a very steady hand and some smooth foot work to get a nice even cut on the 16' panel.

This is what it looked like before we started.

The finished part back on the truck.

The part after sanding and a first cut on the polisher.

We are very happy to have this part done and out of the way. The part came out even and consistent in the 16'. Next up will be to start the polishing process on the rest of the panel.

Sunday, February 5, 2017

Siding and Cargo Doors

 As promised a little more in depth pictures of the hinge assembly. This is the back side of the block that holds the hinge in place and the black piece is the adjustable part that will allow us to make the adjustment.

 We added a bar across the back to keep the black piece in place when we install it into the tubing.

Layed out the spot that the hinge assembly will be placed.

 Cutout and ready for placement.

 Made a jig to hold the blocks in place for welding.

 Welded in .

The tubing installed into the door cavity.

Showing the adjustment that we have in the hinge. All the way up.

 The adjustment all the way down. This has given us plenty of adjustment in the doors to get the door caps close.

 The rest of the parts of the cargo doors ready for assembly.

 The side part of cargo door being fitted.

 The part before fitment.

 We also added two support brackets in the doors.

The final welding up of the cargo doors.

 We needed to make a adjusting striker for the latch for the cargo doors.

 Welding up the parts for latch.

 The parts that made the finished pieces.

 Need to polished them up before we install them.

 Started to fit the cargo doors. We made spacers for between the door hinges to get the gaps fits.

 The first fit for the cargo doors. Need to do some final finish work to make the doors fit but are really close.

 Back doors all done and installed.

 View from the back side.

 Propane tank in place and making mock up brackets. Did some work on the tanks to get them ready for paint.

 Back view of the box. Started to do the patterns to finish up the sides of the back of the box

 Siding is going on. We made bracket to attach to the frame work of the box and glued elevator bolts to the side of the siding. The brackets are slotted so that we can slide on and off the siding. This will let the painter get the paint under where the siding is in contact with the panels. After paint we will also weld the siding to the frame for extra insurance.

 A look at the brackets from the inside.

 The brackets have worked out great for fitting the siding to the truck. Theirs been a lot of taking on and off to get the siding to fit the body lines.

 Some of the fit of the siding to the body line.

 More of the siding.

 The siding still needs to be fitted to the back of the truck. We have a rough shape but will do the final fit when we get the inside panel done.

 We needed to figure out how we were going to get the flat panel to fit the extruded siding. It took some time but we worked it out. We took 3/8 material and machine a slot in it and attached it to the panel. We plan on giving the outside panel a soft radius to match up with the siding.

 When we made the adjustments to fit the panel to the bottom we created a problem at the top that we needed to address. First we had to shim the frame with 5/16 material and then offset the flat panel 1/8 so that the siding on top will fit the panel.

8
 This is a test piece that we used to make sure that our measurements all work out.

 We came close to nailing it, but will need to trim off some of the leg on the back side so it will fit.

 This is where the flat panel meets the body line and where the top siding will come together.

 Test fitting the flat panel on the side where the serving window will be. 

 The other side of the opening.

 Still need to fit the top and bottom piece to complete the opening.

 Practice on a little spot on the siding the rest will be polished like this.

Had a chance to project the logo on the side of the panel to get a look at what it will look like. Plan on making the logo a badge that will attach to the truck.

 A look at one of the test fit of all the siding on the truck. One of many and more to come to get it right.

A little fun in photoshop. A few more weeks of fine tuning and this thing will be heading to paint. After that we will get it back to complete the inside and assemble the rest of the truck.