Sunday, October 9, 2016

Rear Panels Part 2

 The corners getting welded together.

 Second round of welds to fill in the low spots. Chris used the router with a round over bit to get a nice even radius after the build up. We had some contaminants in some of the welding that took some time to work out, but Chris persevere to get it perfect. The back will all be polished so everything had to be dead on. 

 Some more hinges being installed for the back doors
  
 Using concealed hinges for a clean look.

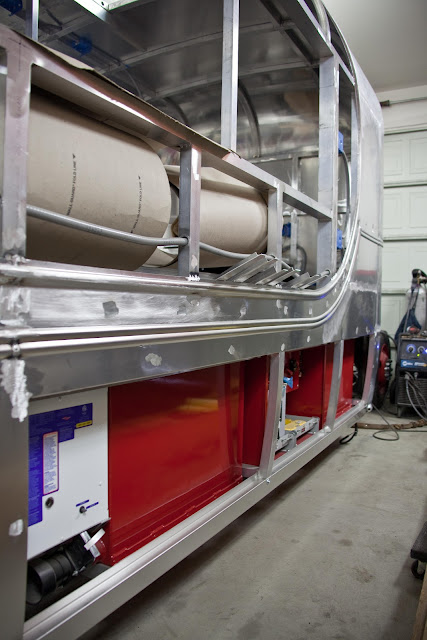
Starting to putting together the back panels. The propane gas regulators will be placed inside these opening in the panel. I know square would have been easier but where's the fun in that.

 Getting ready to weld in the pockets.

 Panel all welded, fitted, and being glued in place. We glued the panels in so we wouldn't have to deal with the effects of the heat that the welds would produce.

 Started to polish the panel where the gas valve will be placed. I'm thinking this might have not been my greatest idea, but man it's going to look awesome.

 Just have the valve in place to see what it's going to look like. Need to do some work on the base so it will fit closer to the back of the opening. The header piece that goes above the door was formed wrong so we are waiting for the piece to finish out the doorway. Once we have that we can measure for the doors and get started on them.  

 We moved onto cutting the extruded aluminum so that we can fit them to truck.

 Each panel needs to be fitted to the trucks body line that was designed so that the extruded metal would fit just right. A good profile gauge is a big help on getting a nice fit.

To make it easier for the body man we are having the body work done on the body line where the extruded metal will be. It would be almost impossible to achieve a nice clean line if we installed the siding before this was done. 

Friday, September 9, 2016

Rear Panel Work

Started to work on the rear panels of the truck this week. This is the rear panel that will house the taillights. It will be a polished finish when done.

We used a 1/8" router bit to round off the sharp edges where the taillight will go.

The rear panel was bump with a break to get the radius that we needed for it to fit the truck. It took some time to get the break lines out of the panel. We started out with 80 grit to get it flat then worked are way down from there. (180,240,380,400,600) 

Have about 10 hours into at this point.

This is the start of the first cut with the polisher. Found that I need to go back and do a little more work in sanding department.

I'm thinking this might not have been a wise decision, but man it looks good when it all done.

While I was working on the rear panel Chris was fabricating the rear steps.

The step formed and tact and ready for test fit into the opening.


Top panels and stairs in and being welded into place.

The weld will be rounded off to match the radius in the formed step.

Well I'm almost done with the front being polished. I did the second cut but need to work on my final cut on the panel. In the mean time Chris was ready for the panel so the final polish will wait till later. We are laying out the holes to be drilled for the trim work that we did for the taillights.

At this point you can see the trim piece in place and we have the studs in place to hold the taillight housing
.
We used a epoxy glue to attach the elevator bolts for the housing. 

Are custom taillight housing that we made from a 70-73 camaro.

Housing ready to be bolted in so we can turn it up and see what it looks like.

Don't look to closely to the polish work it's not completely done yet.


The middle section of the panel will be cut out for the stair opening. 

Ready to be dismantle and fitted to the truck.

We had to do some trimming for the panel to fit, but after that it was a great fit.

All clamp down and ready to be welded together.

Tuesday, August 30, 2016

Welding, Grinding, and Finish Work on the Box


 Got the call that are center caps were done. These are the tooling that were used to cast the parts. After casting was done they were machine for the lug nuts holes.

 Here is the part on the truck before it went to the polisher. We almost went with the cast parts because it looks very vintage, but in the end decided to go with the polished to match the beauty rings that will go on.
  
 The stock front on the motorhome had only 5 lug bolts but still use a 10 hole rim. We had the hub machined to add 5 more studs to make it match the rear 10 bolt that was stock.

 This is rear hub in its cast before polishing and before the chrome lug caps were put on. Well nine of them anyway.


 We had a extra cap made and had it sent out to be polished to see the outcome before we had the rest done. We were very pleased with the out come and the cost of the finished product. Haven't put on a trim ring yet to see the final look. Going to wait for the last moment of the build to give me that wow factor. Gives me something to look forward to.
  
 Chris started to weld all the panels together while I followed behind with the grinder.

 Chris used a spool gun and went thorough about ten spools. It took about two weeks to get the seams all welded and finished. Still have some spots that need grinding but for the most part it is done.


 After some grinding work.

 Made some scaffolding to make it easier to do the work on the top. That's Chris doing some finishing work on the welds.

 How that we have the panels all welded in place we can finish out the door opening.
These are the side panels for the door openings that will be welded in.

 The bottom and top door opening were formed in the panels that we have already installed.

 A close look on the door side panels welded in.


We have all the door opening welded in and almost have them finished out. This week we will be able to get final measurements for the doors and be able to draw them out. We will then send out the parts that will make up the doors to be formed. We are making final adjustments in the door hinges to make sure we have a good fit. The doors will have shaved handle and gas shocks to assist with the door opening. Our plan is to start on the rear steps and taillight panel while we wait for parts for the doors.